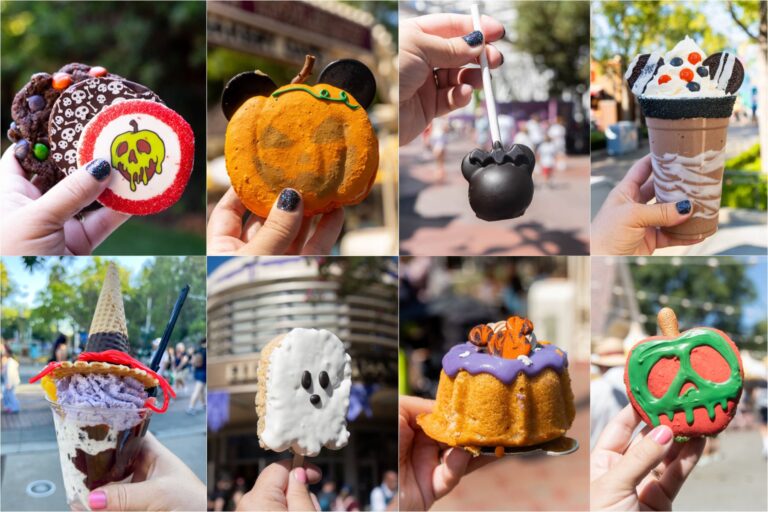
Sweet Little Debbie Cake Bites How To
Little Debbie Cake Balls: A Nostalgic Treat That’s Pure Joy in Every Bite
You know that feeling when you open a box of Little Debbie snacks and suddenly you’re ten years old again, sitting cross-legged on the living room floor with a glass of milk? That’s the magic I wanted to capture—and share—with these Little Debbie cake balls. They’re not just dessert; they’re little bites of childhood wrapped in chocolatey goodness. I first made them for my niece’s birthday party, thinking they’d be a fun twist on the usual cupcakes. But honestly? They stole the show. Soft, fudgy, and ridiculously easy to whip up, these cake balls turn a beloved snack into an elegant (but still totally playful) treat. Whether you’re prepping for a bake sale, a gift box, or just because it’s Tuesday and you deserve something sweet, these are the kind of treats that make people smile before they even take a bite. Plus, they come together in under an hour—no fancy equipment or baking degree required.
What Is Little Debbie Cake Balls?
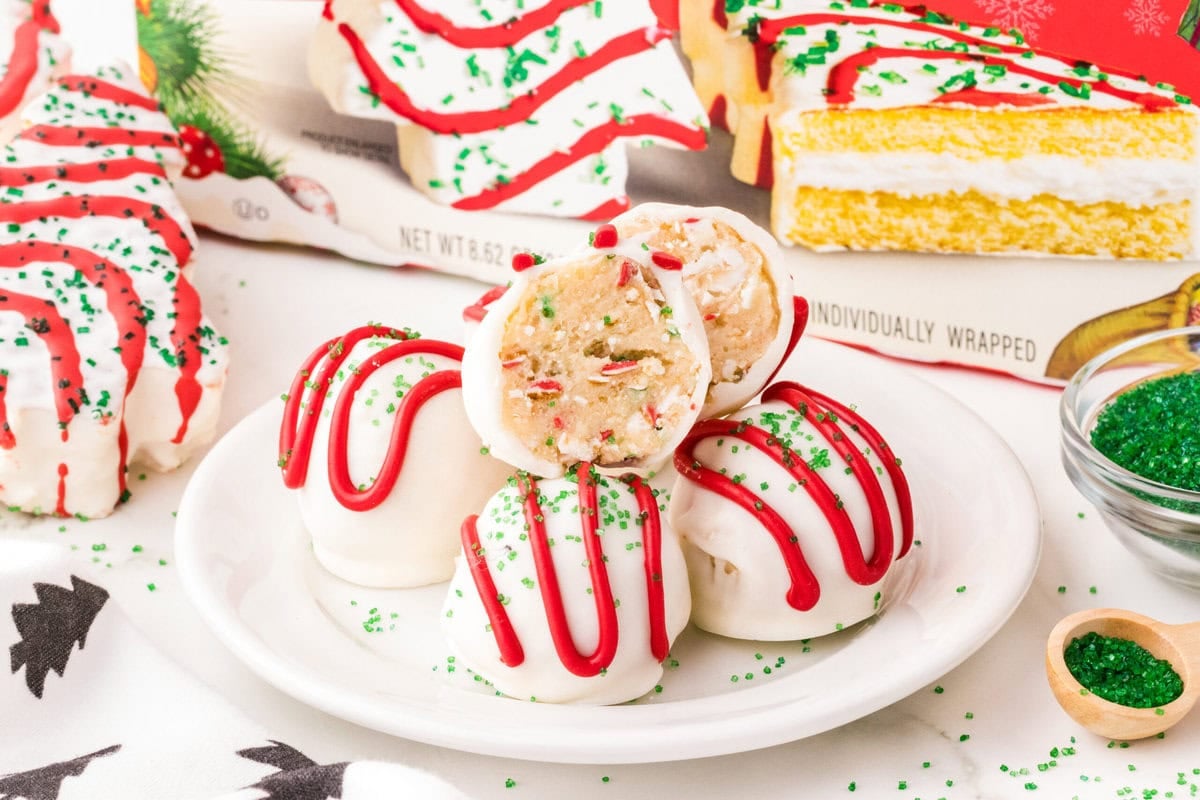
At their core, Little Debbie cake balls are bite-sized morsels made by crumbling store-bought Little Debbie cakes (like Swiss Rolls, Oatmeal Creme Pies, or Cosmic Brownies), mixing them with just enough frosting to bind them together, rolling them into neat little spheres, and then dipping them in melted chocolate. Think of them as the lovechild between cake pops and nostalgic snack cakes—but even easier because you’re starting with something already baked and delicious. The result is a dense, moist, intensely flavorful treat that holds its shape perfectly without any baking required on your part. It’s the ultimate “cheater’s dessert” that still feels homemade and thoughtful. I’ve used everything from classic Zebra Cakes to seasonal Pumpkin Delights, and each version brings its own cozy charm. These aren’t just for kids, either—adults go crazy for them too, especially when you add a sprinkle of sea salt or a drizzle of caramel on top.
Enjoying this article?
Subscribe and never miss an update.
We respect your privacy. Unsubscribe at any time.
Why You’ll Love This Recipe
Let me be real: life’s too short to spend hours in the kitchen fussing over complicated desserts. That’s exactly why I fell head over heels for these Little Debbie cake balls. First off, they’re stupidly simple. No creaming butter, no sifting dry ingredients separately, no worrying about overmixing. You literally dump, crumble, mix, roll, and dip. Done. But beyond the ease, there’s something deeply satisfying about transforming a humble snack cake into something that looks—and tastes—like it came from a boutique bakery. The texture is divine: rich, moist, and melt-in-your-mouth tender, with that signature Little Debbie sweetness balanced perfectly by the chocolate coating.
And let’s talk versatility! Swap out the cake flavor based on what’s in your pantry or what mood you’re in. Feeling festive? Use Christmas Tree Cakes. Craving chocolate? Grab a box of Fudge Rounds. Want to impress guests? Roll half in crushed nuts, half in sprinkles, and half plain—just because. They’re also fantastic for gifting. Pop them in mini cupcake liners, tie them up in a cellophane bag with a ribbon, and boom—you’ve got a homemade gift that feels way more special than store-bought. Plus, kids can help with every step (except maybe the hot chocolate dipping!), making it a perfect weekend activity. Honestly, once you try these, you’ll wonder why you ever bothered with anything else.
How to Make Little Debbie Cake Balls
Quick Overview
This recipe takes about 45 minutes from start to finish, though most of that time is hands-off chilling. You’ll crumble your chosen Little Debbie cakes, mix in a spoonful of frosting to bind everything together, roll the mixture into balls, freeze them briefly to firm up, then dip them in melted chocolate. That’s it! No oven, no mess, no stress. The hardest part is waiting for them to set so you can dig in.
Ingredients
You only need four simple ingredients:
- 1 box of Little Debbie snack cakes (any variety—Swiss Rolls work great!)
- 3–4 tablespoons of store-bought or homemade frosting (vanilla or cream cheese flavor pairs nicely)
- 12 ounces of melting chocolate or chocolate chips (semi-sweet or milk chocolate)
- Optional toppings: sprinkles, crushed nuts, shredded coconut, or a pinch of sea salt
Step-by-Step Instructions
Start by unwrapping all your Little Debbie cakes and placing them in a large mixing bowl. Use your hands or a fork to crumble them into fine crumbs—you want them almost powdery, with no big chunks. Add 3 tablespoons of frosting and mix well with a spatula or your hands until the mixture holds together when squeezed. If it’s too dry, add another tablespoon of frosting. Roll the mixture into 1-inch balls (about 20–24 total) and place them on a parchment-lined baking sheet. Pop the tray into the freezer for 15–20 minutes—this makes dipping way easier.
While they chill, melt your chocolate in a microwave-safe bowl in 30-second intervals, stirring between each, until smooth. Using a fork or dipping tool, carefully coat each cake ball in chocolate, let the excess drip off, and place it back on the parchment. Add toppings immediately if using. Let the chocolate set at room temperature or speed things up by refrigerating for 10 minutes. Serve chilled or at room temp—either way, they’re irresistible!
What to Serve It With
These Little Debbie cake balls are perfect all on their own, but if you’re serving them at a gathering, pair them with a cold glass of milk, a scoop of vanilla ice cream, or a steaming cup of coffee. They also shine alongside fresh berries—strawberries or raspberries cut through the richness beautifully. For a party platter, arrange them with other no-bake treats like chocolate-dipped pretzels or Peanut Butter cups. And if you’re gifting them, tuck a few into a mason jar with a handwritten note—it’s such a sweet, personal touch.
Top Tips for Perfecting Your Little Debbie Cake Balls
First, don’t skip the freezing step! It keeps the balls from falling apart when you dip them. Second, use high-quality melting chocolate—it sets smoother and tastes way better than regular chocolate chips (though those work in a pinch). Third, if your mixture feels too sticky, pop it in the fridge for 10 minutes before rolling. And finally, get creative with coatings! White chocolate with rainbow sprinkles feels festive, while Dark Chocolate with a flaky sea salt finish adds a gourmet twist. Oh, and pro tip: wear food-safe gloves when rolling—it keeps your hands clean and helps the balls stay uniform.
Storing and Reheating Tips
Store your Little Debbie cake balls in an airtight container in the refrigerator for up to 5 days. They actually taste even better the next day as the flavors meld! If you made a big batch, you can freeze them for up to 2 months—just thaw in the fridge overnight before serving. No reheating needed; they’re best enjoyed cold or at room temperature. Just avoid leaving them out in warm weather for too long, or the chocolate may soften.
Frequently Asked Questions
Final Thoughts
Making these Little Debbie cake balls reminded me why I fell in love with baking in the first place: it’s not about perfection—it’s about joy, memory, and sharing something sweet with people you care about. Whether you’re reliving your own childhood or creating new traditions with your little ones, these little bites pack a whole lot of happiness. So go ahead, grab a box of your favorite snack cakes, turn on some music, and have fun with it. Life’s better with dessert—especially when it’s this easy and this delicious.
Sweet Little Debbie Cake Bites How To
Ingredients
Method
- In a large mixing bowl, combine the unprepared chocolate cake mix, softened butter, powdered sugar, vanilla extract, and milk. Mix until a thick, dough-like consistency forms.
- Roll the mixture into 1-inch balls and place them on a parchment-lined baking sheet. Freeze for 15 minutes to firm up.
- In a microwave-safe bowl, melt the chocolate chips and coconut oil in 30-second intervals, stirring between each, until smooth.
- Dip each chilled cake ball into the melted chocolate, ensuring full coverage. Use a fork to lift and let excess drip off.
- Place the coated bites back on the parchment paper and immediately sprinkle with sprinkles if desired. Let set at room temperature or in the refrigerator until firm.
Ah, this brings back so many childhood memories! The nostalgia hits hard with every bite—thanks for sharing this sweet throwback.
Ah, this brings back so many childhood memories! Nothing beats the nostalgic sweetness of Little Debbie cake bites.
Love these – they’re like a fun, edible trip down memory lane! Perfect for parties or just treating yourself.
Oh man, this brings back so many memories! I remember eating these as a kid — they’re such a fun and sweet treat.
This brings back so many childhood memories! The nostalgia hits hard every time.