Easy Dark Chocolate Granola Recipe
The Chocolate Granola Recipe That’s Too Good to Keep Secret
You know that cozy feeling when you’re curled up with a warm mug of coffee, and the kitchen smells like toasted oats and melted chocolate? That’s exactly what this chocolate granola brings to your mornings—and honestly, your late-night snack sessions too. I’ve been tweaking this recipe for years, testing ratios, swapping sweeteners, and burning a few batches (oops), but this version? It’s the one. Crispy, crunchy, deeply chocolatey without being overly sweet, and packed with wholesome goodness. It’s the kind of granola that disappears faster than you can say “second bowl,” and once you try it, you’ll understand why I can’t stop making it. Whether you’re topping yogurt, eating it straight from the jar, or gifting it in a cute mason jar, this chocolate granola feels like a hug in snack form. And the best part? It’s ridiculously easy to whip up—no fancy equipment, just a bowl, a spoon, and your oven.
What Is Chocolate Granola?
Chocolate granola is everything you love about classic granola—crunchy clusters, hearty oats, a touch of sweetness—but with a rich, cocoa-kissed twist that turns your breakfast into something special. Unlike store-bought versions that are often loaded with sugar and preservatives, this homemade chocolate granola strikes the perfect balance between indulgent and nourishing. It’s made with simple, real ingredients: rolled oats, nuts, seeds, a hint of maple syrup or honey, and real cocoa powder that gives it that deep chocolate flavor without any artificial aftertaste. The magic happens in the oven, where everything bakes into golden, crispy clusters that hold together just enough to scoop—but still break apart satisfyingly in your bowl. It’s not just a topping; it’s the star of the show. Whether you’re a granola purist or a chocolate lover at heart, this version bridges the gap beautifully, making it a pantry staple in my kitchen—and now, hopefully, yours too.
Enjoying this article?
Subscribe and never miss an update.
We respect your privacy. Unsubscribe at any time.
Why You’ll Love This Recipe
This chocolate granola isn’t just another recipe—it’s a game-changer for your mornings, your snacks, and even your gifting game. First off, it’s incredibly versatile. I’ve eaten it over Greek yogurt with fresh berries, stirred into oatmeal, sprinkled on Ice Cream (don’t judge!), and honestly, straight from the baking sheet when it’s still warm and slightly soft. It’s also naturally sweetened, so you’re not dealing with a sugar crash later—just steady energy and that satisfying crunch. Plus, it’s customizable! Swap almonds for pecans, add dried cherries or coconut flakes, or go nut-free if needed. The base is forgiving and welcoming to your favorite add-ins. And let’s talk about aroma—baking this fills your whole house with the comforting scent of toasted oats and chocolate, like a cozy café on a rainy Sunday. It’s also freezer-friendly, so you can make a big batch and stash some for later. Whether you’re meal prepping, hosting brunch, or just craving something wholesome that still feels like a treat, this chocolate granola delivers every single time. It’s become my go-to gift for friends moving into new homes or recovering from a tough week—because sometimes, the simplest things say “I care” the loudest.
How to Make Chocolate Granola
Quick Overview
This chocolate granola comes together in under 10 minutes of prep and bakes in about 25–30 minutes, making it perfect for a lazy weekend morning or a quick weekday batch. You’ll mix your dry ingredients—oats, nuts, seeds, and cocoa powder—then stir in a simple wet mixture of oil, maple syrup, vanilla, and a pinch of salt. Spread it evenly on a baking sheet, bake until golden and fragrant, then let it cool completely so it crisps up into those perfect clusters. No fancy techniques, no special tools—just honest, homemade goodness. And because it keeps well, you can make a double batch and enjoy it all week long.
Ingredients
You’ll need just a handful of pantry staples: 3 cups old-fashioned rolled oats, 1 cup chopped nuts (I love almonds or walnuts), ¼ cup unsweetened cocoa powder, ¼ cup chia seeds or flaxseeds, ½ teaspoon sea salt, ⅓ cup coconut oil (melted), ⅓ cup pure maple syrup or honey, 1 teaspoon vanilla extract, and optional add-ins like dark chocolate chips or dried fruit (added after baking).
Step-by-Step Instructions
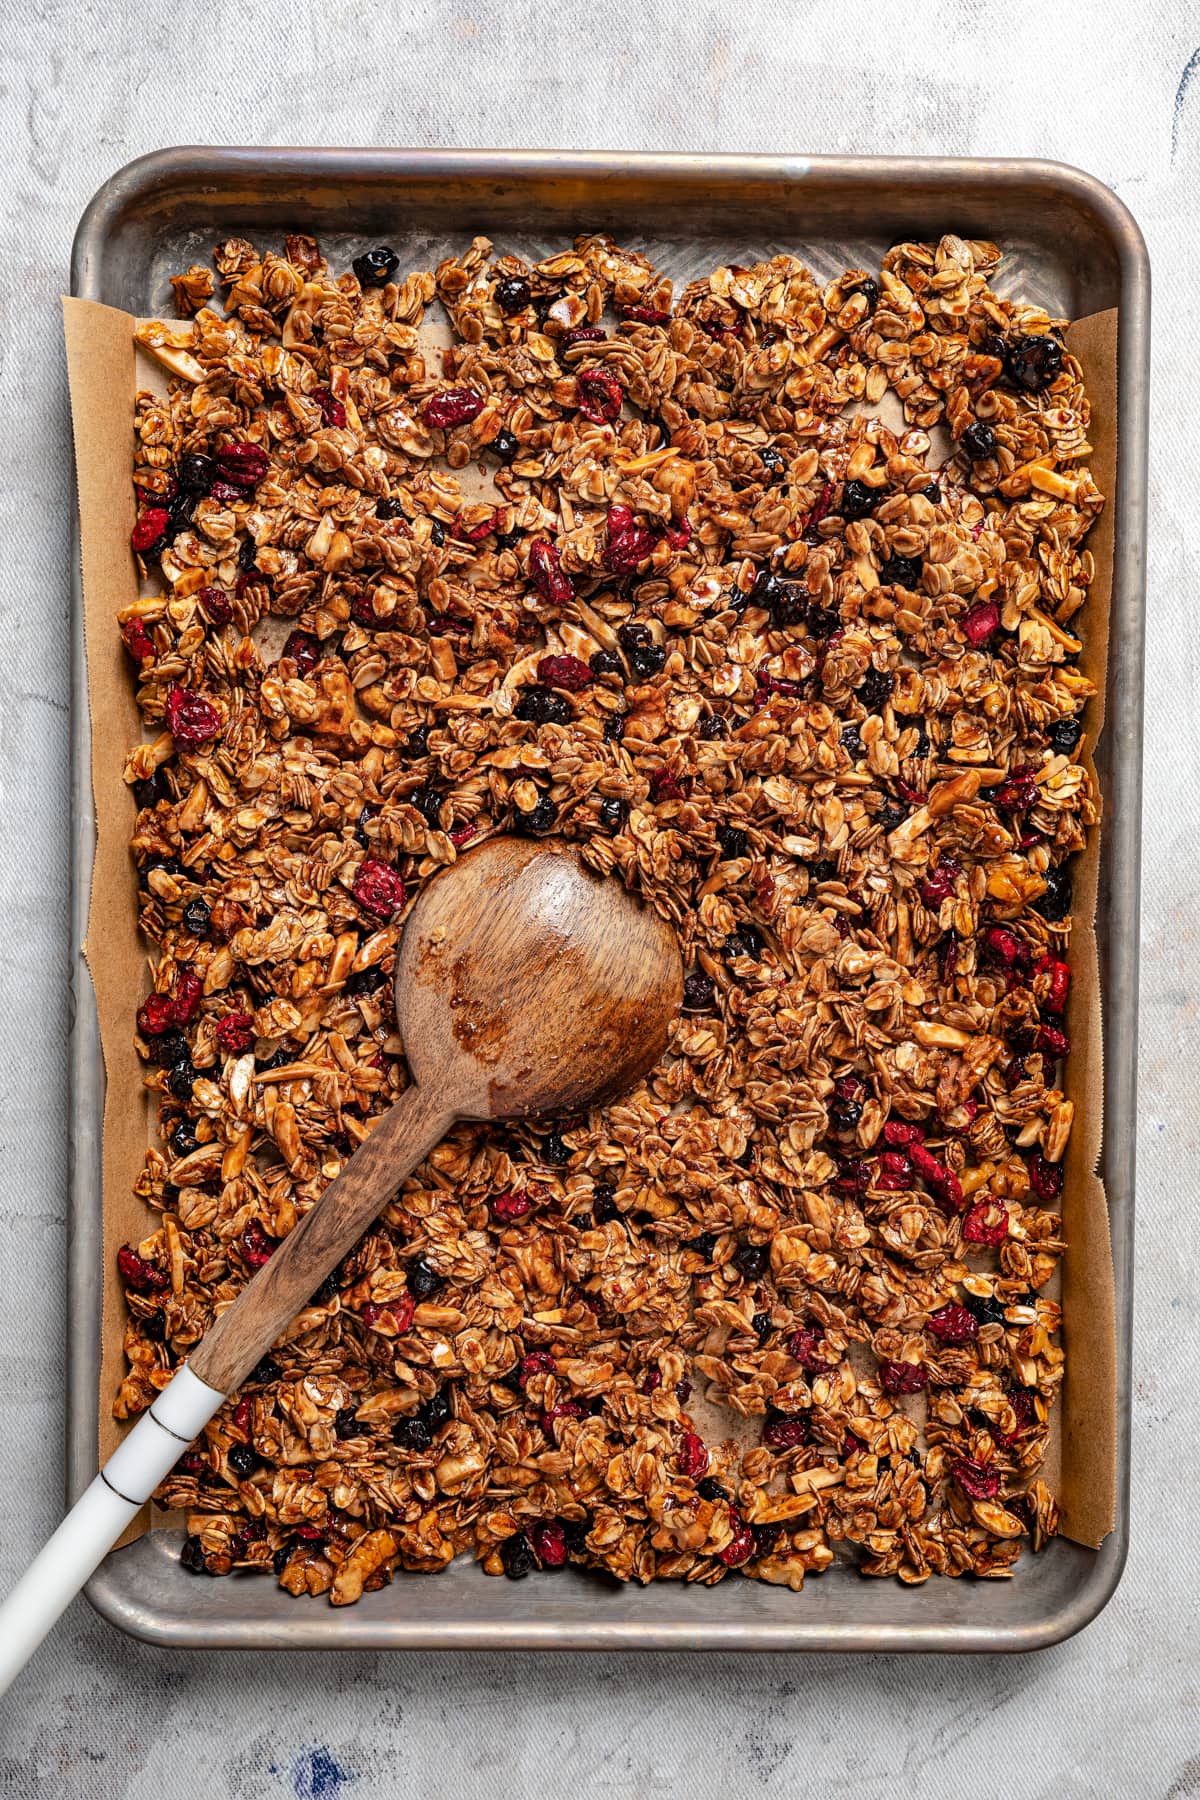
Preheat your oven to 325°F (160°C) and line a large baking sheet with parchment paper. In a big bowl, combine the oats, chopped nuts, cocoa powder, chia or flaxseeds, and salt. In a separate small bowl, whisk together the melted coconut oil, maple syrup, and vanilla until smooth. Pour the wet mixture over the dry ingredients and stir thoroughly—everything should be evenly coated. Spread the mixture in an even layer on the prepared baking sheet, pressing it down gently with a spatula to help form clusters. Bake for 20–25 minutes, stirring once halfway through, until it’s fragrant and slightly darker in color. Let it cool completely on the pan—this is key for crispiness! Once cool, break into clusters and stir in any chocolate chips or dried fruit if using. Store in an airtight container and enjoy!
What to Serve It With
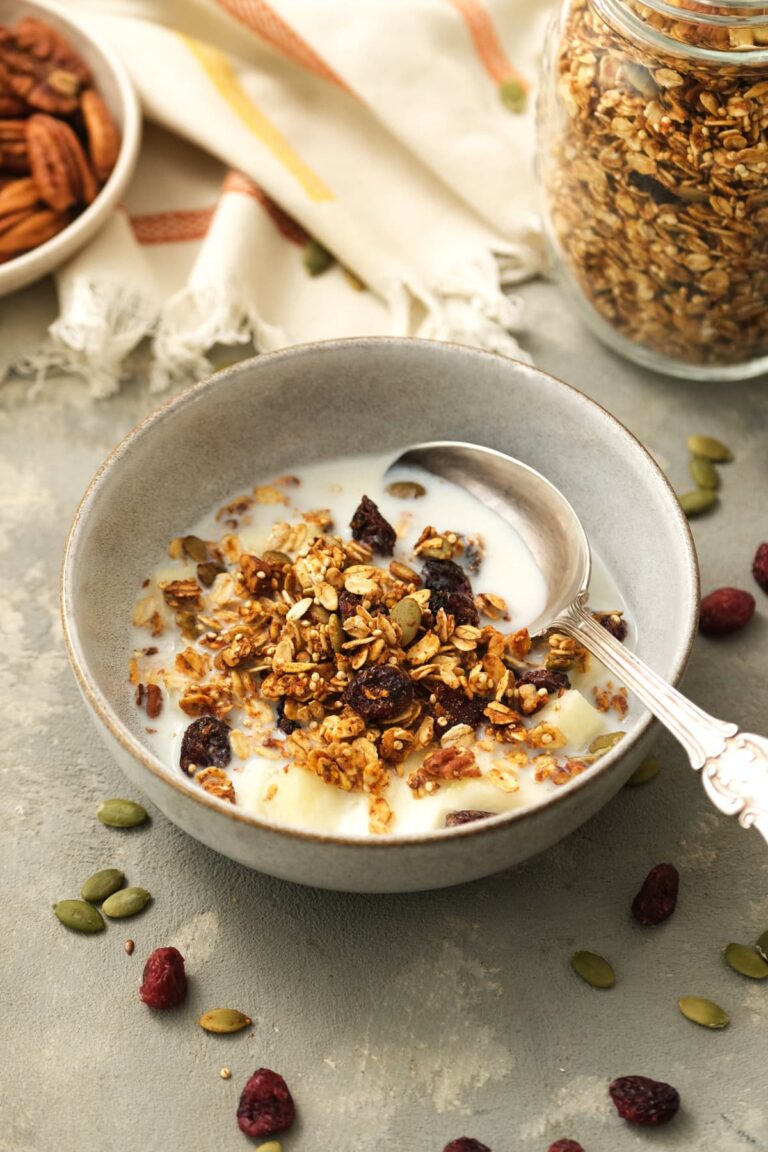
This chocolate granola shines in so many ways! My favorite is over thick Greek yogurt with a drizzle of honey and a handful of fresh raspberries—creamy, tangy, crunchy, and sweet all at once. It’s also amazing stirred into warm oatmeal or layered in a parfait with banana slices and a sprinkle of cinnamon. For a lighter option, try it over a bowl of mixed greens with apple slices and a lemon-tahini dressing (yes, really—it works!). And don’t sleep on pairing it with milk as a cereal—especially if you let it soak for a minute to soften just slightly. It even makes a fantastic topping for smoothie bowls or vanilla ice cream. Honestly, if it involves a bowl and a spoon, this granola probably belongs in it.
Top Tips for Perfecting Your Chocolate Granola
First, don’t skip pressing the mixture down before baking—it helps create those coveted clusters. Second, let it cool completely before breaking it up; rushing this step leads to crumbly, not crunchy, granola. Third, use good-quality cocoa powder—Dutch-processed gives a richer, smoother chocolate flavor. If your granola turns out too soft, it likely needed a few more minutes in the oven or didn’t cool long enough. And if you’re adding chocolate chips or dried fruit, always do it after baking to prevent burning or excess moisture. Lastly, taste as you go! Adjust the sweetness or salt to your liking—this recipe is your canvas.
Storing and Reheating Tips
Store your chocolate granola in an airtight container at room temperature for up to 2 weeks—though mine never lasts that long! For longer storage, pop it in the freezer for up to 3 months; just let it come to room temperature before serving. If it loses a bit of crunch over time, you can refresh it by spreading it on a baking sheet and warming it in a 300°F (150°C) oven for 5–7 minutes. Just keep an eye on it so it doesn’t burn. Pro tip: portion it into small jars or bags right after cooling—it makes grabbing a serving (or gifting it!) so much easier.
Frequently Asked Questions
Final Thoughts
This chocolate granola has become one of those recipes I return to again and again—not just because it tastes incredible, but because it feels like a little act of self-care every time I make it. There’s something so grounding about measuring out oats, stirring in cocoa, and watching it transform in the oven. It reminds me that the best things in life don’t need to be complicated. Whether you’re making it for yourself, your family, or someone you love, I hope it brings you as much joy as it brings me. Now go grab that bowl—you’ve earned a crunchy, chocolatey moment.
Easy Dark Chocolate Granola Recipe
Ingredients
Method
- Preheat your oven to 325°F (165°C) and line a large baking sheet with parchment paper.
- In a large bowl, combine the oats, chopped nuts, shredded coconut, cocoa powder, and salt. Mix well.
- In a separate small bowl, whisk together the maple syrup, melted coconut oil, and vanilla extract until smooth.
- Pour the wet mixture over the dry ingredients and stir until everything is evenly coated.
- Spread the mixture in an even layer on the prepared baking sheet. Bake for 15 minutes, then remove and stir gently to ensure even browning.
- Return to the oven and bake for another 5–7 minutes, or until fragrant and slightly crisp. Watch closely to avoid burning.
- Remove from the oven and let cool completely on the baking sheet. The granola will crisp up as it cools.
- Once cooled, stir in the dark chocolate chips. Store in an airtight container at room temperature for up to 2 weeks.
I love how this granola pairs so well with coffee—so comforting! I’ll definitely be trying this recipe this weekend.
I’ve made this granola a few times and it’s always a hit—perfectly crunchy with rich chocolate flavor. Will definitely be making this again!
I just tried this recipe and it’s incredible—so crunchy and rich, I can’t stop munching on it straight from the jar!
This granola sounds perfect for my morning routine—chocolate and crunchy all in one! Can’t wait to try it.
I just made this granola and it’s incredible! So crunchy, rich, and perfect with yogurt. Will definitely be making this again.