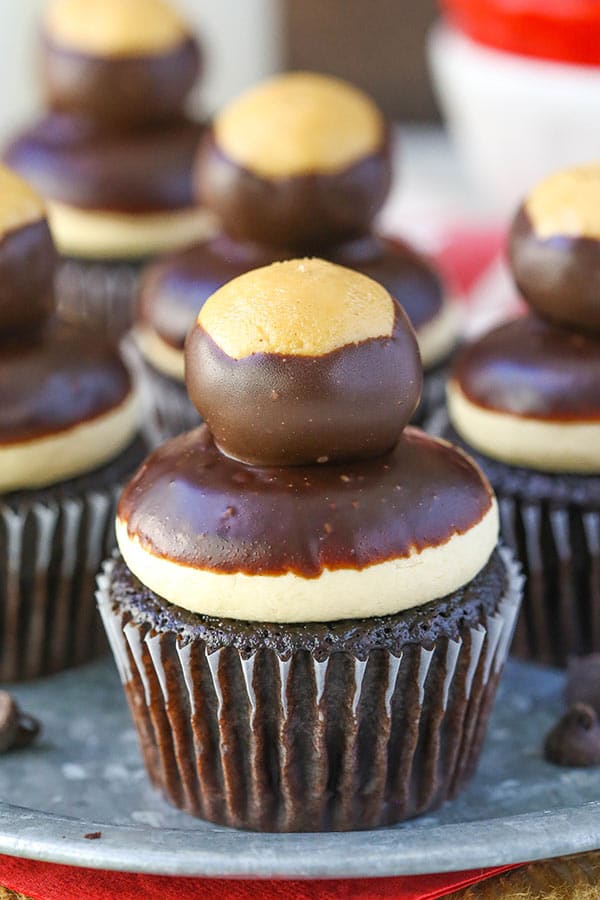
Easy Peanut Chocolate Buckeye Cupcakes
My Grandma’s Secret Peanut Chocolate Swirl Cake (That You’ll Want to Make Forever)
You know that feeling when you take a bite of something so comforting, so rich, and so perfectly balanced that it instantly transports you back to childhood? That’s exactly what happens every time I bake this peanut chocolate swirl cake—a recipe passed down from my grandma, who swore the secret was “just enough Peanut Butter to make your soul happy.” It’s not overly sweet, not too dense, and has this gorgeous marbled swirl that makes each slice feel like a little surprise. Whether you’re craving a cozy weekend treat or need a show-stopping dessert for guests (that’s actually easy to whip up), this one hits all the right notes. The aroma alone—warm cocoa mingling with roasted peanuts—will have your whole house smelling like a hug. And honestly? Once you try it, you’ll understand why I’ve made this at least once a month for the past decade. So grab your whisk, put on your favorite apron, and let’s bake something delicious together.
What Is Peanut Chocolate Swirl Cake?
This peanut chocolate swirl cake is a tender, moist vanilla-based cake layered and swirled with a luscious mixture of melted dark chocolate and Creamy Peanut Butter. Think of it as the lovechild of a classic marble cake and your favorite peanut butter cup—only better, because it’s homemade and packed with real flavor. Unlike store-bought versions that rely on artificial shortcuts, this recipe uses simple pantry staples: butter, eggs, flour, good-quality cocoa, and a generous dollop of natural peanut butter (the kind that’s just peanuts and maybe a pinch of salt). The magic happens when you gently fold the chocolate-peanut batter into the vanilla base, creating those dreamy, uneven swirls that look almost too pretty to eat… almost. Baked in a single 9-inch round pan, it’s perfect for slicing and sharing—or not sharing, if you’re feeling particularly fond of it (no judgment here!).
Enjoying this article?
Subscribe and never miss an update.
We respect your privacy. Unsubscribe at any time.
Why You’ll Love This Recipe
First off, this cake is ridiculously forgiving. Even if you’re not a confident baker, you can’t really mess it up—the swirl doesn’t need to be perfect (in fact, rustic is better!), and the batter comes together in under 15 minutes with just one bowl and a whisk. Plus, it uses ingredients you likely already have on hand, so there’s no last-minute grocery run unless you’re out of peanut butter (and let’s be real—that’s a crisis in itself).
But beyond convenience, it’s the flavor balance that wins me over every time. The peanut butter adds a nutty depth and slight saltiness that cuts through the richness of the chocolate, while the vanilla cake keeps everything light and fluffy. It’s indulgent without being heavy—perfect with a cup of coffee in the morning or as an after-dinner dessert with a scoop of vanilla Ice Cream.
And honestly? There’s something deeply satisfying about baking something that tastes this good without fancy techniques or expensive tools. My grandma didn’t own a stand mixer, and hers was always the best. That’s the spirit of this recipe: approachable, heartfelt, and made with love. Whether you’re baking for someone special or just treating yourself (you deserve it!), this cake delivers comfort in every single bite.
How to Make Peanut Chocolate Swirl Cake
Quick Overview
This cake takes about 10 minutes to prep, 35–40 minutes to bake, and another hour to cool (I know, the waiting is the hardest part!). You’ll mix a simple vanilla cake batter, then divide part of it into a second bowl and stir in melted chocolate and peanut butter. Alternate spoonfuls of each batter into your pan, give it a gentle swirl with a knife, and pop it in the oven. The result? A moist, tender cake with beautiful marbling and a flavor that’ll make everyone ask for the recipe.
Ingredients
For the vanilla cake base:
- 1 ½ cups (190g) all-purpose flour
- 1 ½ tsp baking powder
- ¼ tsp salt
- ½ cup (113g) unsalted butter, softened
- ¾ cup (150g) granulated sugar
- 2 large eggs, room temperature
- 1 tsp pure vanilla extract
- ½ cup (120ml) whole milk, room temperature
For the Peanut Chocolate swirl:
- ¼ cup (60g) creamy natural peanut butter
- 2 tbsp (15g) unsweetened cocoa powder
- 2 tbsp (30ml) hot water
- 2 tbsp (25g) granulated sugar
Step-by-Step Instructions
Preheat your oven to 350°F (175°C). Grease a 9-inch round cake pan and line the bottom with parchment paper for easy removal.
In a large bowl, whisk together the flour, baking powder, and salt. Set aside.
In another bowl (or the same one, if you’re minimizing dishes like me!), beat the softened butter and sugar until light and fluffy—about 2–3 minutes. Add the eggs one at a time, mixing well after each, then stir in the vanilla.
Alternating in three additions, add the dry ingredients and milk to the butter mixture, beginning and ending with the dry mix. Mix just until combined—don’t overdo it!
Now, pour about half of the vanilla batter into a separate bowl. To this portion, add the peanut butter, cocoa powder, hot water, and 2 tbsp sugar. Stir until smooth and glossy.
Spoon alternating dollops of vanilla and chocolate-peanut batter into your prepared pan. Use a butter knife or skewer to gently swirl the batters together—just 3–4 figure-eight motions. Over-swirling will blend them too much!
Bake for 35–40 minutes, or until a toothpick inserted into the center comes out clean or with a few moist crumbs. Let cool in the pan for 15 minutes, then transfer to a wire rack to cool completely before slicing.
What to Serve It With
This cake shines on its own, but if you want to elevate it, serve warm slices with a scoop of vanilla bean ice cream and a drizzle of warm chocolate sauce. A sprinkle of flaky sea salt on top? Game-changer. For brunch, pair it with fresh berries and a dollop of whipped cream. And of course, a mug of strong coffee or a glass of cold milk makes it feel like pure comfort.
Top Tips for Perfecting Your Peanut Chocolate Swirl Cake
Room temperature ingredients are your best friend—they blend smoothly and create a more even crumb. Don’t skip the parchment paper; it ensures your cake releases cleanly. If your peanut butter is super thick, warm it slightly in the microwave for 10 seconds to make mixing easier. And remember: less is more with the swirl! A few gentle folds give that beautiful marbled effect without turning it into a muddy mess. Lastly, use natural peanut butter (no added sugars or oils) for the best flavor—it melds perfectly with the chocolate.
Storing and Reheating Tips
Store leftover cake in an airtight container at room temperature for up to 3 days, or in the fridge for up to 5 days (it actually tastes even richer chilled!). To reheat, pop a slice in the microwave for 15–20 seconds or warm it in a 300°F oven for 5 minutes. It also freezes beautifully! Wrap individual slices in plastic wrap and foil, then freeze for up to 2 months. Thaw overnight in the fridge before enjoying.
Frequently Asked Questions
Final Thoughts
Baking this peanut chocolate swirl cake always brings me right back to my grandma’s kitchen—the smell of cocoa in the air, her humming old tunes, and that first warm slice we’d sneak before dinner. It’s more than just a dessert; it’s a little piece of home. I hope it becomes one of your go-to recipes too—simple enough for a Tuesday night, special enough for a celebration, and delicious enough to make you close your eyes after the very first bite. Happy baking, friend. And don’t forget to save me a slice!
Easy Peanut Chocolate Buckeye Cupcakes
Ingredients
Method
- Preheat oven to 350°F (175°C). Line a 12-cup muffin tin with paper liners.
- In a large bowl, whisk together flour, sugar, cocoa powder, baking powder, baking soda, and salt.
- In another bowl, mix milk, vegetable oil, egg, and vanilla until smooth.
- Gradually add wet ingredients to dry ingredients, stirring until just combined. Do not overmix.
- Divide batter evenly among muffin cups, filling each about two-thirds full.
- Bake for 16–18 minutes, or until a toothpick inserted in the center comes out clean. Cool completely.
- While cupcakes cool, prepare peanut butter filling: Beat peanut butter, powdered sugar, softened butter, and vanilla until smooth and creamy.
- Use a small spoon or melon baller to scoop out a small portion from the center of each cooled cupcake, creating a well.
- Fill each well with about 1 tablespoon of peanut butter mixture, smoothing the top.
- For the ganache, heat heavy cream in a small saucepan until just simmering. Pour over chocolate chips and let sit for 2 minutes, then stir until smooth.
- Spoon ganache over each cupcake, allowing it to drip down the sides. Let set for 15–20 minutes before serving.
This recipe sounds amazing! I love how it blends peanut and chocolate—definitely adding this to my weekend baking list.
These cupcakes sound absolutely divine! I can already imagine how rich and chocolatey they’d be—definitely adding this to my recipe list.
These cupcakes look absolutely divine! That peanut chocolate swirl is such a genius twist—definitely adding this to my must-try list.
These sound absolutely divine—I’d love to recreate my grandma’s recipe! Any tips for keeping the swirl just right?
These sound absolutely dreamy—I can already taste the peanut and chocolate combo! Can’t wait to try my own version.