Easy No-Bake Oreo Treat Recipe
Easy No-Bake Oreo Dessert That Sets in Just 2 Hours
If you’ve ever craved something rich, creamy, and packed with that unmistakable Oreo crunch—without turning on the oven—this no-bake Oreo dessert is your new go-to. It’s ridiculously simple, sets up fast in the fridge, and tastes like a cross between cheesecake and cookies-and-cream Ice Cream. I’ve made this for birthdays, potlucks, and even just because it was Tuesday and I needed a win. Trust me, one bite and you’ll be hooked.
What Is Oreo Dessert?
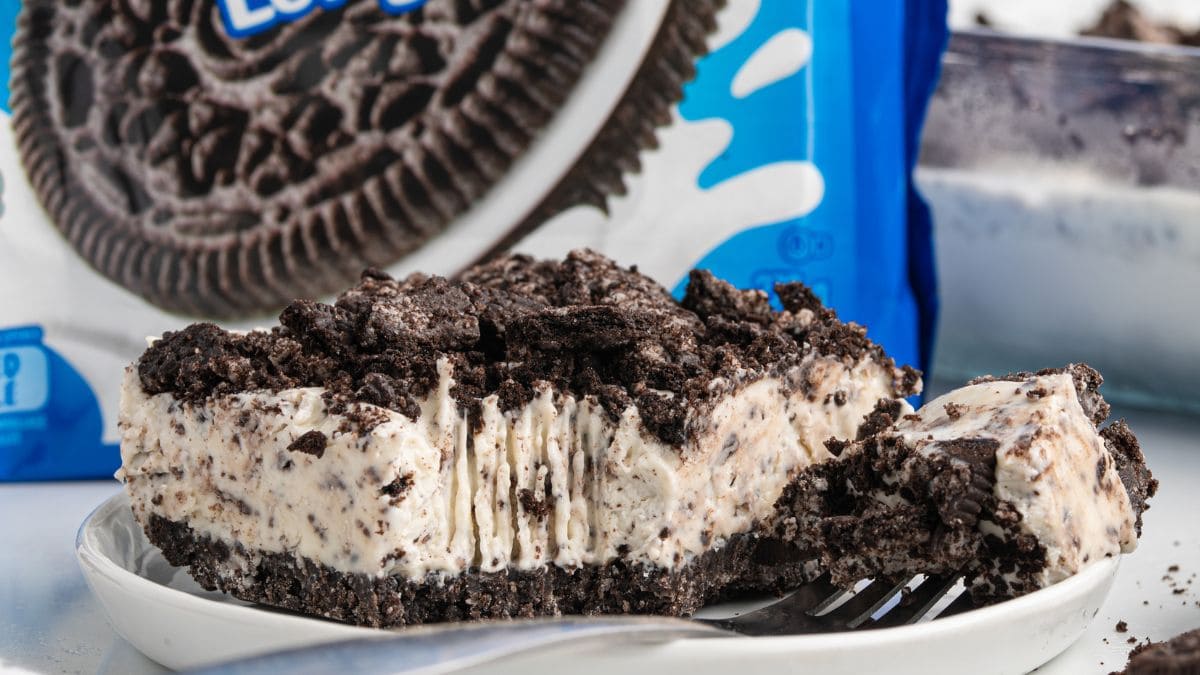
This Oreo dessert is a chilled, no-bake treat built on a buttery Oreo crust, layered with a velvety Cream Cheese filling studded with crushed cookies, and topped with whipped cream and more Oreo crumbles. It’s not a pie, not quite a mousse—it’s its own glorious category of indulgence. The magic lies in how the filling firms up in the fridge, giving you clean slices with every bite while still staying luxuriously smooth. It’s the kind of dessert that looks fancy but takes less effort than washing a sink full of dishes. Perfect for warm nights, last-minute invites, or when you want to impress without breaking a sweat.
Enjoying this article?
Subscribe and never miss an update.
We respect your privacy. Unsubscribe at any time.
Why You’ll Love This Recipe
First off, it’s no-bake—which means no hot kitchen, no fussy oven temps, and definitely no burnt edges. Just mix, press, chill, and enjoy. The texture is everything: that crisp cookie base gives way to a cloud-like filling that melts on your tongue, with little bits of Oreo adding just the right amount of crunch. And because it sets firmly, it travels well—take it to a picnic, pack it for a road trip, or stash it in the back of the fridge for midnight cravings.
I also love how customizable it is. Swap regular Oreos for Double Stuf if you’re a filling fan, or try mint or chocolate-filled versions for a twist. Plus, it’s naturally egg-free and doesn’t require gelatin, so it’s accessible for most diets (just check your whipped topping if you’re vegan). My sister once made it with gluten-free Oreos for her celiac friend, and honestly? Nobody noticed the difference. That’s how good this base recipe is.
How to Make Oreo Dessert
Quick Overview
This recipe comes together in under 20 minutes of active time, then chills for 2 hours (or overnight) to set. You’ll crush Oreos for the crust and the filling, whip up a Cream Cheese mixture, layer it all in a pan, and let the fridge do the rest. No special equipment needed—just a food processor or zip-top bag, a mixing bowl, and a 9×13-inch dish. It’s foolproof, even if you’re not a confident baker.
Ingredients
You’ll need just 7 ingredients—most of which are pantry staples or easy to find:
- 36 Oreo cookies (regular or Double Stuf), divided
- 6 tablespoons unsalted butter, melted
- 8 oz (1 block) full-fat cream cheese, softened
- 1 cup powdered sugar
- 1 teaspoon vanilla extract
- 1 cup heavy whipping cream
- 2 tablespoons whole milk (optional, for consistency)
Step-by-Step Instructions
Start by lining a 9×13-inch baking dish with parchment paper, leaving overhang on the sides for easy removal later. Crush 24 Oreos finely (reserve the rest for the filling and topping)—you can pulse them in a food processor or place them in a zip-top bag and whack with a rolling pin. Mix the crumbs with melted butter until it resembles wet sand, then press firmly into the bottom of your dish. Pop it in the freezer while you make the filling.
In a large bowl, beat the softened cream cheese until smooth. Add powdered sugar and vanilla, and mix until creamy. In another bowl, whip the heavy cream (and milk, if using) to stiff peaks. Gently fold the whipped cream into the cream cheese mixture until no streaks remain. Roughly chop the remaining 12 Oreos into pea-sized pieces and fold those in too.
Spread the filling evenly over the chilled crust. Smooth the top, then cover and refrigerate for at least 2 hours—or ideally overnight. Before serving, top with a dollop of whipped cream and a sprinkle of extra Oreo crumbs. Use the parchment overhang to lift the whole slab out, then slice into squares.
What to Serve It With
This Oreo dessert stands beautifully on its own, but if you’re feeling extra, serve it with fresh berries (raspberries cut through the richness nicely) or a drizzle of chocolate sauce. It’s also fantastic alongside a scoop of vanilla ice cream for a “dessert duo” effect. For parties, cut it into small bars—they’re easier to grab and look adorable on a platter.
Top Tips for Perfecting Your Oreo Dessert
Let your cream cheese come to room temperature—cold cream cheese leads to lumps, and nobody wants that. If your whipped cream deflates a bit when folding, don’t panic; it’ll still set up fine. For the cleanest slices, dip your knife in hot water and wipe it dry between cuts. And here’s my secret tip: freeze the crust for 10 minutes before adding the filling. It prevents crumbs from mixing in and keeps those layers distinct.
Storing and Reheating Tips
Store leftovers covered in the fridge for up to 5 days. It actually tastes even better the next day as the flavors meld. Do not freeze this dessert—the cream cheese filling can separate and turn grainy upon thawing. If you’re prepping ahead, make it the night before; it’ll be perfectly set and ready to serve.
Frequently Asked Questions
Final Thoughts
This Oreo dessert has saved me more times than I can count—whether it’s a sudden craving, a friend dropping by, or just needing a little sweetness in my day. It’s comforting, uncomplicated, and always delivers. Make it once, and I guarantee it’ll become your go-to no-bake treat. Just don’t blame me when you start hiding the leftovers from your family!
Easy No-Bake Oreo Treat Recipe
Ingredients
Method
- Remove the filling from 12 Oreo cookies and set aside. Crush all 36 cookies (including the ones with filling) into fine crumbs using a food processor or by placing them in a sealed bag and crushing with a rolling pin.
- In a large bowl, beat the softened cream cheese until smooth. Add the reserved Oreo filling, powdered sugar, and vanilla extract. Mix until fully combined.
- Gently fold in the whipped heavy cream until the mixture is light and fluffy.
- In an 8x8-inch dish, press half of the crushed Oreos into the bottom to form an even layer.
- Spread the cream cheese mixture evenly over the cookie crust.
- Top with the remaining crushed Oreos, pressing lightly to adhere.
- Refrigerate for at least 4 hours or until firm. Slice and serve chilled.

This looks perfect for a quick sweet fix! I’ve made similar no-bake recipes before and they always turn out delicious—excited to try this one.
This looks so easy and delicious! I’ve been looking for a quick dessert idea like this, thanks for sharing.
This looks delicious! I love how easy it is—perfect for when I want a sweet treat without all the hassle.
This looks perfect for my Oreo craving! Love that it sets in just 2 hours—so easy and no baking needed.