Easy Travel Binder for Babysitters
The Travel Binder: Your Ultimate Organizer for Stress-Free Adventures
You know that feeling when you’re packing for a trip and suddenly realize you’ve forgotten your passport… again? Or worse—you arrive at the airport only to discover your boarding pass is buried under three layers of receipts, snack wrappers, and that random sock you swore you’d find a mate for? Yeah, we’ve all been there. That’s exactly why I created my travel binder—a simple, no-fuss system that keeps every essential document, itinerary, and memory in one tidy place. It started as a desperate attempt to survive a chaotic family vacation, but now? It’s my non-negotiable travel companion. Whether you’re jetting off to Paris or road-tripping across the country, this little binder saves me from last-minute panic and actually makes traveling feel… fun. Plus, it doubles as a sweet keepsake after the trip ends. Let me show you how to build your own—because everyone deserves peace of mind (and a little extra room in their carry-on).
What Is a Travel Binder?
A travel binder isn’t just a folder stuffed with papers—it’s a thoughtfully organized, portable command center for your entire trip. Think of it as your personal travel assistant that fits neatly in your bag. At its core, it holds all your critical documents: passports, visas, boarding passes, hotel confirmations, rental car info, and even printed maps or attraction tickets. But it doesn’t stop there. Many travelers (myself included!) use it to tuck in daily itineraries, restaurant reservations, emergency contacts, and even space for jotting down spontaneous moments—like that incredible gelato spot you stumbled upon or the name of the local artist whose work made you cry. I use a simple 3-ring binder with clear sheet protectors, which lets me swap things in and out easily and keeps everything protected from spills or crumpled corners. It’s low-tech, yes, but honestly? There’s something deeply satisfying about flipping through physical pages instead of frantically scrolling through your phone at customs.
Enjoying this article?
Subscribe and never miss an update.
We respect your privacy. Unsubscribe at any time.
Why You’ll Love This Recipe
First off, this isn’t really a “recipe” in the traditional sense—but hear me out. Just like baking your grandma’s famous Chocolate Chip Cookies, creating a travel binder is about care, intention, and a little bit of love. And once you’ve made one, you’ll wonder how you ever traveled without it. The biggest win? Zero digital dependency. No more worrying about dead batteries, spotty Wi-Fi, or accidentally deleting that crucial PDF. Everything you need is right there, crisp and ready. It also forces you to plan ahead—not in a rigid, stressful way, but in a calming, “I’ve got this” kind of way. You’ll sleep better knowing your travel insurance details aren’t lost in your email abyss. Plus, it’s incredibly customizable. Add pockets for foreign currency, a section for kids’ activity sheets, or even a mini photo sleeve for instant prints. I’ve even seen travelers use theirs as a scrapbook mid-trip, gluing in ticket stubs and postcards as they go. And let’s be real—there’s a certain joy in holding something tangible that represents your adventure. It feels more real than another notification on your phone. Whether you’re a seasoned globetrotter or planning your first solo getaway, this binder brings clarity, calm, and a touch of old-school charm to modern travel.
How to Make a Travel Binder
Quick Overview
Making your travel binder takes less than an hour and requires just a few supplies you probably already have at home. Start with a sturdy 1-inch 3-ring binder (I prefer one with a clear front pocket so I can slip in a custom cover). Then, gather your documents, print out key info, and organize everything into labeled sections using dividers or sheet protectors. The beauty is in the simplicity—no fancy tools, no apps, no subscriptions. Just you, your trip details, and a little bit of prep. Once it’s done, tuck it into your carry-on and breathe easy knowing everything you need is within arm’s reach.
Ingredients
Here’s what you’ll need to build your perfect travel binder:
- 1-inch 3-ring binder with clear cover (acid-free if you plan to keep it long-term)
- Set of 5–7 tabbed dividers (label them: Documents, Itinerary, Reservations, Maps & Guides, Emergency Info, Memories)
- Clear sheet protectors (at least 20–30)
- Printed copies of: passport photo page, visa (if needed), travel insurance policy, flight/hotel confirmations, rental agreements
- Pen and small notepad or sticky notes
- Optional: pocket pages for receipts, zipper pouches for coins, photo sleeves
Step-by-Step Instructions
Start by labeling your dividers clearly—this is your roadmap. Slide your most important documents into sheet protectors and place them behind the “Documents” tab: passport copy, visa, travel insurance, and emergency contacts. Next, add your day-by-day itinerary under the “Itinerary” section, including flight times, hotel addresses, and must-see attractions. Under “Reservations,” tuck in confirmations for restaurants, tours, or events. Use the “Maps & Guides” section for printed maps, public transit info, or downloaded offline guides. Don’t forget the “Emergency Info” page—list local emergency numbers, your country’s embassy address, and any medical notes. Finally, leave the “Memories” section blank for now; you’ll fill it during your trip with ticket stubs, notes, or Polaroids. Once everything’s in, snap your binder shut and give it a proud pat—you’re ready to roam!
What to Serve It With
Your travel binder shines brightest when paired with a few complementary habits. Keep a small travel wallet or pouch with your actual passport, cash, and cards—don’t rely solely on the binder for originals. Pair it with a lightweight, durable carry-on bag that has a dedicated pocket for the binder so it doesn’t get crushed. And if you’re traveling with kids, consider making mini binders for them with coloring pages, activity sheets, and their own “adventure journal.” It turns organization into a family ritual. Bonus: slip a printed copy of your binder’s table of contents into your checked luggage, just in case.
Top Tips for Perfecting Your Travel Binder
Less is more—don’t overstuff it. If a page isn’t essential, leave it out. Use color-coded tabs or stickers to quickly locate sections. Always make digital backups of key documents and store them in a secure cloud folder, but keep the binder as your primary physical source. Update it as plans change—rip out old pages and insert new ones. And please, laminate your emergency contact page! One spilled coffee in Rome taught me that lesson the hard way. Lastly, personalize it. Add a photo of your travel crew on the cover, or write a little note to your future self on the first page. It’s not just functional—it’s meaningful.
Storing and Reheating Tips
After your trip, don’t toss the binder! Store it in a cool, dry place—I keep mine on a bookshelf next to my travel journals. If you used sheet protectors, gently remove any loose items and file them elsewhere, but leave the core structure intact for your next adventure. Need to “reheat” it for a future trip? Simply swap out the old itineraries and insert new ones. Over time, your binder becomes a beautiful archive of where you’ve been—and where you’re dreaming of going next.
Frequently Asked Questions
Final Thoughts
Creating a travel binder might seem like a small thing—but honestly, it’s one of those quiet game-changers that transforms how you experience the world. It’s not about perfection; it’s about presence. When you’re not frantically searching for your hotel address or worrying about lost documents, you’re free to truly soak in the moment: the smell of fresh bread in a Parisian alley, the sound of waves crashing on a Greek shore, the laughter shared over a shared plate of tacos. This binder? It’s my little love letter to mindful, joyful travel. So grab a binder, gather your papers, and start building yours today. Your future self—standing confidently at baggage claim with everything in order—will thank you.
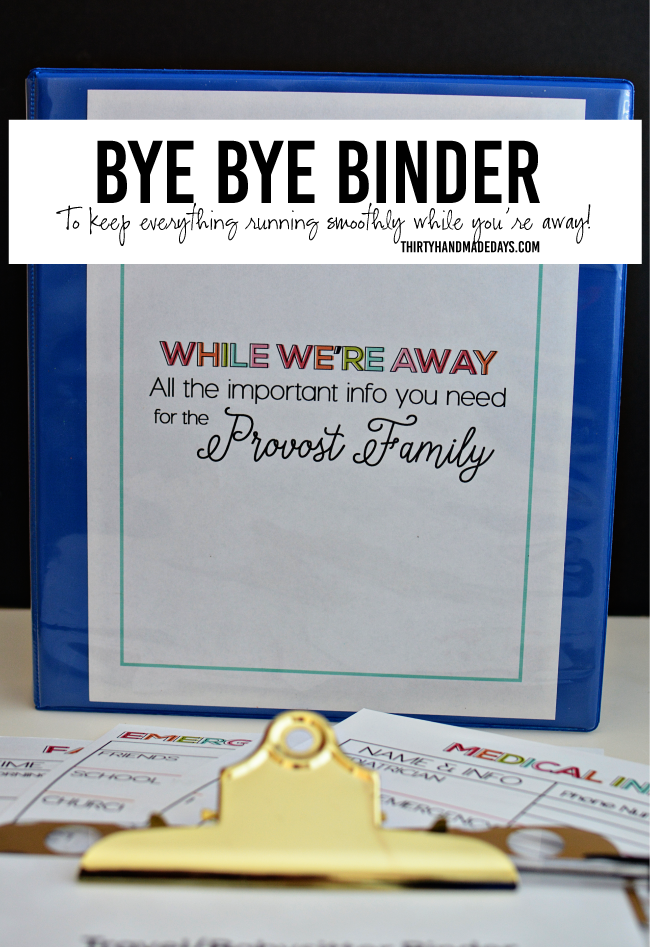
Easy Travel Binder for Babysitters
Ingredients
Method
- Print out essential templates including emergency contact page, daily routine schedule, allergy and medical information, favorite activities, and a notes section.
- Fill out each section with clear, up-to-date information about your child, including doctor’s name, medications, food preferences, and bedtime routine.
- Insert the completed pages into the binder or folder, using dividers to separate each section for easy navigation.
- Laminate critical pages like emergency contacts and medical info to protect against spills and wear during travel.
- Add a pen to the binder using a loop or elastic strap, and store in an easily accessible travel bag or diaper backpack.


Oh no, I’ve been there—left my charger at home and had to borrow one! This binder sounds like a lifesaver for parents.
Oh, I totally get that panic! This travel binder idea is a lifesaver for keeping everything together—especially with kids.
Oh my gosh, this binder is a lifesaver! I used something like this last year and it made our trip so much smoother.
So helpful! I totally get that panic—this binder sounds like a lifesaver for last-minute trips.
This is such a helpful idea! I’d definitely feel more at ease knowing everything is organized in one place.