Easy Ham Cheese Sliders for a Crowd
The Sliders I Can’t Stop Making—And Neither Will You
I’ll never forget the first time I made sliders for a backyard cookout. It was one of those golden summer afternoons—kids laughing, music playing softly in the background, and the grill humming like it had a secret to tell. I pulled these little guys off the heat, stacked them high on a platter, and watched as everyone reached for seconds… then thirds. That’s when I knew: sliders aren’t just mini burgers. They’re little bites of joy, perfect for sharing (or not—no judgment here). Whether you’re feeding a crowd or just craving something cozy and satisfying, these sliders deliver big flavor in small packages. And honestly? Once you try this version—tender, juicy, with just the right amount of seasoning and a toasted bun that holds up without falling apart—you’ll wonder how you ever settled for anything less. So grab your apron, fire up that skillet, and let’s make magic happen.
What Is a Slider?
Sliders are those irresistibly petite sandwiches that pack a serious punch of flavor. Originally born in American diners and burger joints, they’ve evolved into a versatile favorite for everything from game-day snacks to elegant party appetizers. What sets them apart isn’t just their size—it’s the way every component works together: a soft yet sturdy mini bun, a perfectly seasoned patty (beef, chicken, pork, or even plant-based), and just enough toppings to add crunch and zing without overwhelming the bite. Unlike regular burgers, sliders are meant to be eaten in one or two bites, making them ideal for mingling, snacking, or feeding a hungry mob without anyone feeling too full too fast. They’re quick to cook, easy to customize, and—when done right—utterly addictive. Think of them as your go-to comfort food, scaled down but never scaled back on taste.
Enjoying this article?
Subscribe and never miss an update.
We respect your privacy. Unsubscribe at any time.
Why You’ll Love This Recipe
Let me be real with you—this slider recipe has become my kitchen MVP. It’s the kind of dish that feels special but doesn’t demand hours of prep or a pantry full of fancy ingredients. The patties come together in minutes, the buns toast up golden in under five, and the whole thing comes together so fast you’ll wonder why you haven’t been making them every week. Plus, they’re incredibly forgiving: swap in your favorite cheese, add a smear of garlic aioli instead of ketchup, or throw on some caramelized onions if you’re feeling fancy. They travel well, reheat beautifully, and—most importantly—taste like something you’d order at a cozy neighborhood spot, not something whipped up in your own kitchen. Whether you’re hosting friends, feeding picky eaters, or just treating yourself after a long day, these sliders hit the spot every single time. And because they’re small, you can experiment guilt-free—try different meats, sauces, or even buns (brioche, potato rolls, or whole wheat all work!). Honestly, once you start making them, you’ll find excuses to serve them at every gathering.
How to Make Sliders
Quick Overview
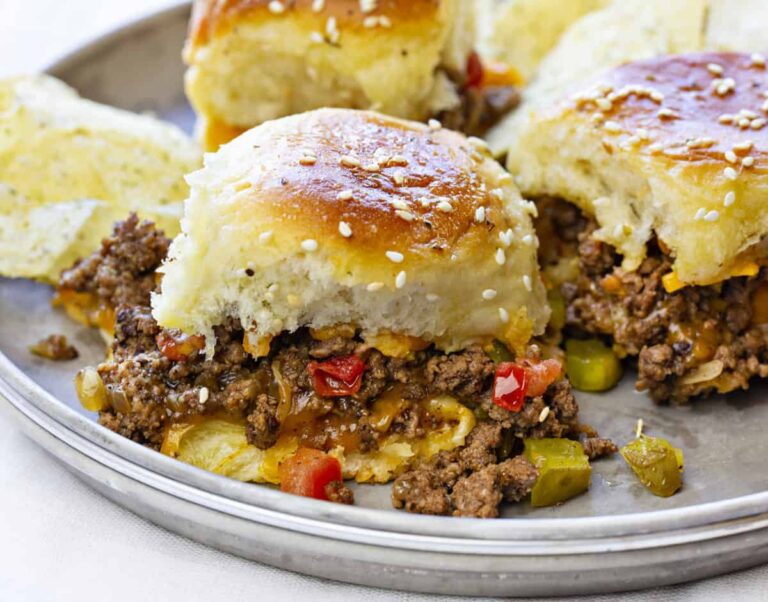
This recipe makes 12 sliders in under 30 minutes start to finish. You’ll shape ground beef into tiny patties, cook them quickly in a hot skillet, toast the buns until lightly golden, and assemble with simple fixings like cheese, lettuce, and pickles. The key is keeping the patties moist and the buns sturdy—no soggy bottoms here! It’s straightforward, stress-free, and delivers restaurant-quality results with minimal effort.
Ingredients
You’ll need: 1 pound ground beef (80/20 blend for best juiciness), 12 slider buns (homemade or store-bought), 6 slices of cheese (American, cheddar, or your favorite melting kind), 1 tablespoon Worcestershire sauce, 1 teaspoon garlic powder, 1 teaspoon onion powder, salt and freshly cracked black pepper to taste, butter for toasting buns, and optional toppings like shredded lettuce, diced pickles, sliced red onion, or your preferred sauce.
Step-by-Step Instructions
In a large bowl, gently mix the ground beef with Worcestershire sauce, garlic powder, onion powder, salt, and pepper—don’t overwork it or the patties will be tough. Divide the mixture into 12 equal portions and shape each into a small, flat patty (about 2 inches wide). Heat a skillet or griddle over medium-high heat. Cook the patties for 2–3 minutes per side, or until nicely browned and cooked through. During the last minute of cooking, place a slice of cheese on each patty and cover the pan briefly to let it melt. While the patties cook, split the slider buns and lightly butter the cut sides. Toast them cut-side down in a separate pan or in the oven until golden and crisp. Assemble each slider by placing a cheesy patty on the bottom bun, adding your favorite toppings, and capping it with the top bun. Serve immediately while warm and gooey!
What to Serve It With
Sliders shine brightest when paired with classic sides that complement their rich, savory flavor. Think crispy french fries (sweet potato fries for a twist!), a simple green salad with a tangy vinaigrette, or even some roasted garlic Parmesan potatoes. For a lighter option, try a cucumber-dill yogurt dip with crudités or a bright coleslaw. And don’t forget drinks! A cold lemonade, iced tea, or even a craft beer pairs beautifully. If you’re serving kids, apple slices or carrot sticks keep things balanced without sacrificing fun.
Top Tips for Perfecting Your Sliders
First, don’t skip the 80/20 beef—it’s the secret to juicy, flavorful patties that don’t dry out. Second, handle the meat as little as possible when forming patties; overmixing leads to dense bites. Third, toast your buns! It adds texture and prevents sogginess. Fourth, let the patties rest for a minute after cooking—they’ll stay tender. Finally, customize freely: swap beef for turkey, add bacon bits, or go vegetarian with a black bean patty. The beauty of sliders is their flexibility—make them yours.
Storing and Reheating Tips
Store any leftover sliders (if you’re lucky enough to have them!) in an airtight container in the fridge for up to 3 days. To reheat, pop them in a 350°F oven for 8–10 minutes, or microwave for 30–45 seconds—though the oven method keeps the bun crisper. Avoid reheating assembled sliders with wet toppings like tomatoes or lettuce; add those fresh after warming. For longer storage, freeze unassembled patties and buns separately for up to 2 months, then thaw and assemble when ready to eat.
Frequently Asked Questions
Final Thoughts
Making sliders isn’t just about feeding people—it’s about creating moments. Those little sandwiches have a way of bringing folks together, sparking conversation, and turning an ordinary meal into something memorable. I hope this recipe becomes a staple in your kitchen, just like it has in mine. Whether you’re celebrating, comforting, or simply craving something delicious, these sliders deliver every time. Now go ahead—make a batch, share them with someone you love, and savor every single bite.
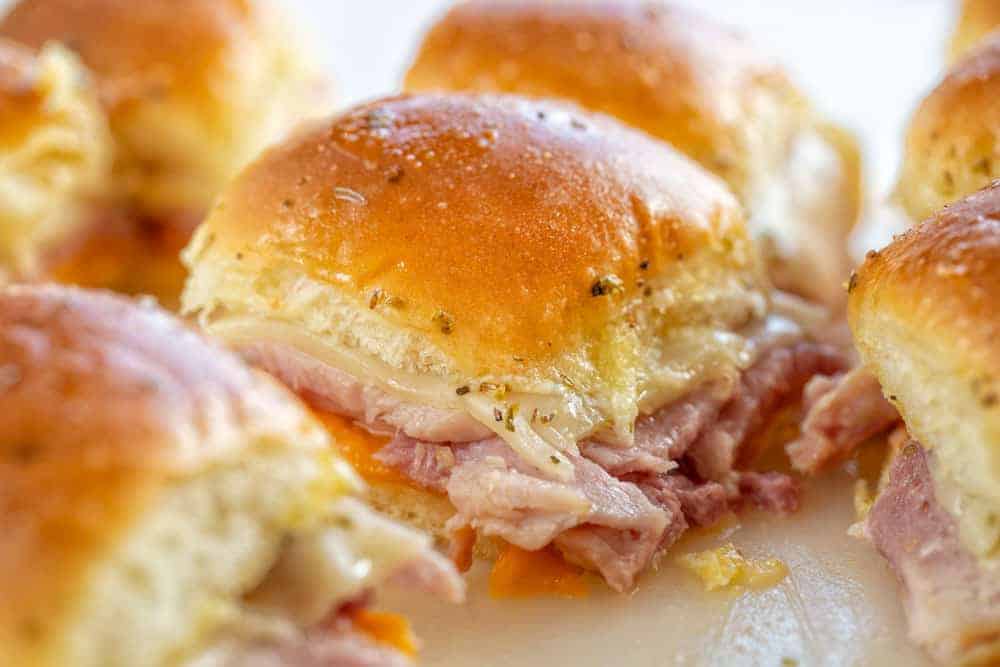
Easy Ham Cheese Sliders for a Crowd
Ingredients
Method
- Preheat oven to 350°F (175°C). Line a baking sheet with parchment paper or lightly grease it.
- Slice the slider buns in half horizontally, keeping them connected if using Hawaiian rolls. Place the bottom halves on the baking sheet.
- Layer the ham evenly over the bottom buns, followed by the Swiss cheese slices. Top with the bun tops.
- In a small bowl, whisk together melted butter, Dijon mustard, poppy seeds, garlic powder, dried onion flakes, and Worcestershire sauce.
- Brush the butter glaze generously over the tops of the sliders, making sure to coat evenly.
- Bake in the preheated oven for 15–20 minutes, or until the cheese is melted and the tops are golden brown.
- Remove from oven and let cool for 5 minutes. Slice into individual sliders and serve warm.


This recipe sounds perfect for any gathering! The combination of ham and cheese is always a hit with the whole family.
This recipe looks perfect for game day! I’ve been looking for a crowd-pleasing slider idea—thanks for sharing!
These sliders look so easy and perfect for gatherings—definitely adding this to my go-to recipe list!
These sliders always get rave shouts at my BBQs—the combo of ham and cheese is pure magic!
These sliders sound perfect for summer gatherings—I’ve hosted a few and they always a hit! Any secret tip to keep them juicy?