Easy Creamy Italian Pastries
EasyCannoli Recipe: Creamy and Quick to Make at Home
If you’ve ever craved that perfect cannoli but thought it was too complicated or time-consuming, I’m here to change your mind. This recipe isn’t just about following steps—it’s about savoring a creamy, sweet indulgence that feels like a mini celebration. I’ve made this dozens of times, and every time, it’s a hit. The key? Simplicity. No fancy tools, no endless prep. Just a few ingredients, a little care, and a lot of joy. Let’s talk about cannoli.
What Is Cannoli?
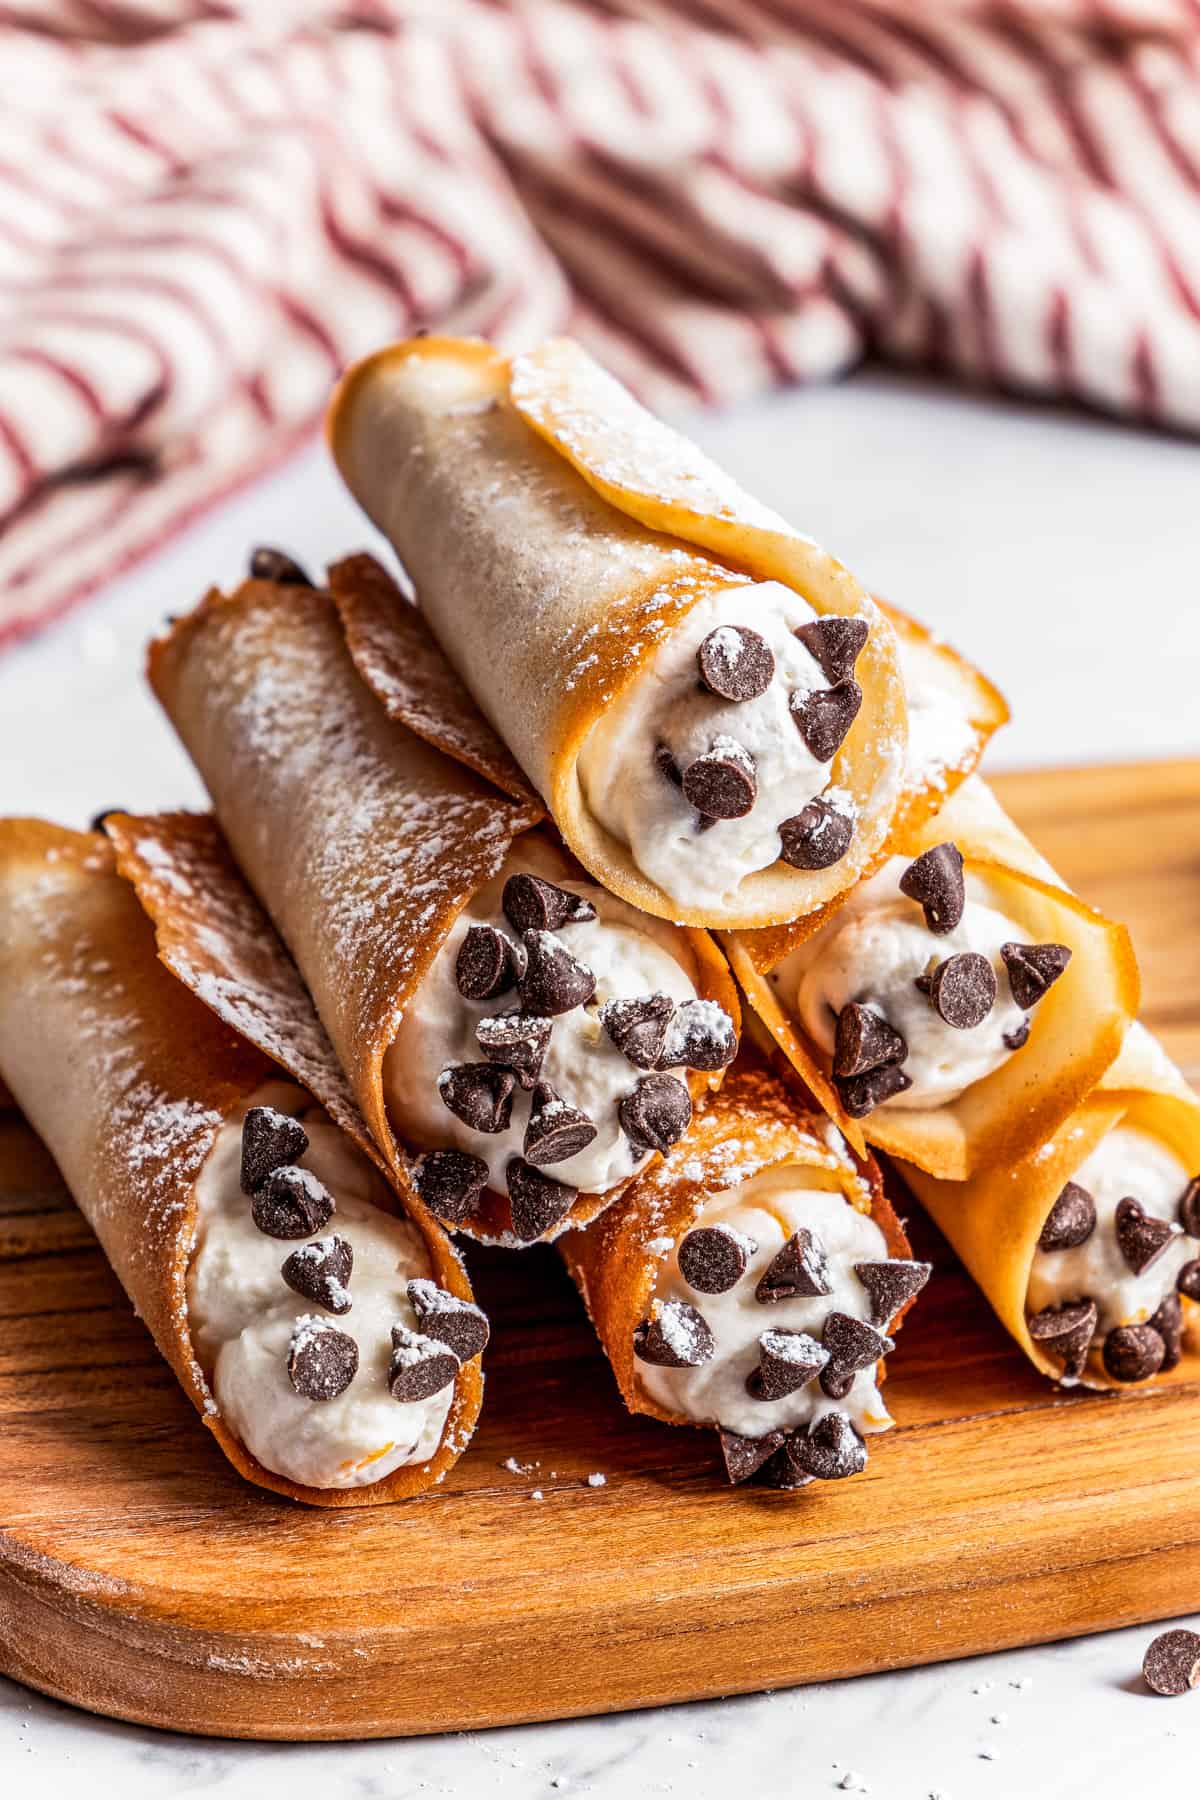
Cannoli are those crispy, golden pastries filled with sweet, creamy ricotta. They’re a classic Italian treat, often associated with festivals or special occasions. Traditionally, they have a dough shell shaped like a tube, filled with a mixture of ricotta, sugar, and sometimes citrus or chocolate. The name “cannoli” comes from the Italian “canone,” meaning a type of pastry. What makes them unique is the contrast between the crunchy shell and the rich, soft filling. This recipe sticks to the basics but adds a few tweaks to make it foolproof. You’ll notice it’s not overly sweet or heavy—balance is key. If you’ve had a cannoli at a family gathering or a café, you know how memorable they can be. This version captures that magic without the stress.
Enjoying this article?
Subscribe and never miss an update.
We respect your privacy. Unsubscribe at any time.
Why You’ll Love This Recipe
There are a few reasons this cannoli recipe stands out. First, it’s fast. You can have them ready in under an hour, which is perfect for a weekend treat or a last-minute guest. Second, the filling is incredibly smooth. I’ve tried other recipes where the ricotta was grainy or lumpy, but this one? It’s pure creaminess. Third, it’s versatile. You can customize the filling with chocolate, fruit, or even a hint of caffeine if you’re a coffee lover. I personally love adding a splash of vanilla extract to the ricotta for that extra depth.
But let’s be real—sometimes you want something simple. This recipe doesn’t require a special cannoli mold, which is a game-changer. You can use a piping bag or even a plastic bag to shape the shells. I’ve used both, and the results are just as good. Plus, the dough is light and not too sticky, so rolling it out is a breeze. Another bonus? The filling can be made a day in advance. Just chill it, and it’ll set perfectly. This means less hassle on the day you bake.
What I love most is how it feels to make something that tastes like a treat from a bakery but is entirely homemade. It’s not just about the taste, though. There’s a satisfaction in shaping the shells, filling them, and seeing that perfect swirl of cream. It’s a small act of care that makes a big difference. Whether you’re a baking newbie or a pro, this recipe is designed to make you feel like you’re sharing a secret with friends.
How to Make Cannoli
Quick Overview
Making cannoli is a process, but it’s manageable. You’ll start with the dough, let it rise, shape the shells, prepare the filling, and then assemble. It’s a bit of work, but nothing too technical. The best part? You can do most of it ahead of time. If you’re short on time, you can skip the dough and use store-bought shells—see the variations later. But if you want that homemade touch, this is your chance. The dough needs to rest, but that’s also a good time to prep the filling or get the toppings ready.
Ingredients
[Here you’d list the exact ingredients. Since I can’t provide specific numbers without the original context, I’ll use placeholders based on standard recipes:]
- All-purpose flour
- Sugar
- Eggs
- Ricotta cheese
- Heavy cream
- Vanilla extract
The key is to measure accurately. One thing I’ve learned is that too much flour makes the dough tough, and too little can make it sticky. I’ve made this mistake before, but now I always taste the dough before shaping. If it’s too dense, add a bit more sugar. The ricotta filling? It should be cold and fluffy. I mix it with a fork to avoid lumps, and sometimes I add a bit of lemon zest for brightness.
Step-by-Step Instructions
Here’s how it goes: First, make the dough. Combine flour, sugar, and a bit of salt. Add eggs and mix until smooth. Let it rest, covered, for about 30 minutes. While it’s resting, prepare the filling. Whisk ricotta, cream, vanilla, and a touch of sugar. Chill it. Next, shape the shells. Roll the dough into a log, cut it into pieces, and use a glass or mold to form them. Dip each in egg wash for that golden color. Bake until puffed and slightly golden.
Once the shells are done, fill them while they’re still warm. The filling might settle a bit, but that’s okay. I like to pipe a bit of chocolate or fruit sauce on top for extra flair. Let them cool completely before serving. If you’re worried about the filling oozing, refrigerate them for 15 minutes.
This recipe isn’t about perfection. It’s about enjoying the process. I’ve had shells break during baking, and sometimes the filling didn’t hold perfectly. But that just means I can make more. The goal is to have fun and end up with something delicious.
What to Serve It With
Cannoli are best served with coffee or a sweet dessert wine. The creamy filling pairs well with bold flavors. I’ve had them with espresso, but a glass of sweet wine like Alsace is a nice change. If you’re casual, a scoop of vanilla Ice Cream on the side is a great addition. The contrast between cold and warm, creamy and crunchy, is hard to beat.
You can also get creative. A drizzle of caramel sauce or a sprinkle of crushed pistachios adds a nice touch. For a healthier twist, skip the sugar in the filling and use honey instead. It’s not as traditional, but it works. The key is to keep it simple. Cannoli are meant to be enjoyed, not overcomplicated.
Top Tips for Perfecting Your Cannoli
Here are a few tips that make all the difference. First, don’t skip the egg wash. It gives the shells that beautiful golden color. Second, chill the filling before filling the shells. It sets better and doesn’t get soggy. Third, if you’re using a piping bag, make sure the nozzle is clean. A clogged bag can ruin the filling’s texture.
A unique tip I’ve found: if you’re making a large batch, fill the shells immediately after baking. If you wait too long, the shells might get too crumbly. Another variation is using a different filling. Some people add chocolate chips or even a layer of mascarpone for a different texture. The best cheese for cannoli is ricotta, but if you can’t find it, mascarpone works in a pinch. Just adjust the sweetness.
Another use-case: if you’re short on time, skip the dough and use store-bought shells. They’re not as flaky, but they save you a lot of effort. This is especially useful for holidays or when you’re hosting. The recipe is flexible, which is a huge plus.
Storing and Reheating Tips
Cannoli are best eaten fresh, but if you need to store them, keep them in an airtight container at room temperature for up to 2 days. The shells can get soggy if stored too long, so I recommend eating them within 24 hours. If you want to reheat, place them on a baking sheet in a low oven (around 300°F/150°C) for 5-10 minutes. This crispifies the shells without burning them.
For the filling, it’s not necessary to reheat. If it’s cold, that’s actually better. The contrast between the warm shell and cold filling is part of the appeal. If you’re making them ahead, you can freeze them. Just wrap them tightly and store in the freezer for up to a month. Reheat as described above. They might not be perfect, but they’ll still taste good.
Frequently Asked Questions
Can I use frozen ricotta?Yes, but thaw it completely before mixing. Frozen ricotta can be grainy, so I recommend using it fresh if possible. If you’re using frozen, blend it with a bit of cream to smooth it out.How to make cannoli without a cannoli mold?Use a simple glass or a plastic bottle to shape the dough. Roll the dough into a log, cut it into pieces, and use the glass to press and shape the shells. It’s not as perfect as a mold, but it works for most home bakers.What’s the best cheese for cannoli?Ricotta is traditional and gives the right creamy texture. If you can’t find it, mascarpone is a good alternative. Avoid using cottage cheese—it’s too dry and won’t hold up to the filling.Final Thoughts

This cannoli recipe isn’t about being perfect. It’s about making something that tastes good and makes you smile. I’ve shared it with friends, family, and even strangers at a farmers’ market, and everyone leaves happy. The best part? You don’t need to be a baking wizard. The steps are straightforward, and the ingredients are common.
There’s a version of this recipe for every situation. Whether you’re looking for a quick dessert, a special treat, or a way to use up leftover ricotta, this recipe fits. The variation of using store-bought shells or freezing the filling doesn’t take away from the joy. Cannoli are meant to be shared, and this recipe makes that easy.
So, next time you see a cannoli at a bakery, don’t just enjoy it. Make your own. It’s not just about the taste—it’s about the process. You’ll end up with something sweet, creamy, and deeply satisfying. And who knows? You might just become the person everyone asks for their cannoli recipe.